Using Airtable as a Jekyll website database
Can you use Airtable as the database for a Jekyll website? Yes, but it may not work as you expect:
At the end of the day, all Jekyll does is generate a bunch of static HTML files. Anything non-static happens at build step. So yes, you can access your Airtable data, but not in real time. Each time you update your Airtable base, the website will need to be rebuilt to reflect those changes.
Okay, but why use a dynamic database for a static site? Reasons may vary. For most projects, you probably won’t need this but sometimes it makes sense. For example, things might become cumbersome if your website grows too data-heavy for a static site, or if you need to collaborate with non-developers. This is where Airtable comes in: instead of manually updating lengthy data files, you can work and collaborate on your data in Airtable.
Since this method makes use of the Jekyll-native _data folder approach, most
existing Jekyll projects should be able to use it without any significant
changes. If you stick with the attribute names present in your _data files and
reuse them in Airtable, you shouldn’t even need to touch any of your template
files.
I love when tutorials go with real-world examples instead of FooBar, to-do list, and now Wordl clone projects, so we will be creating a real website called UpToDate, which will keep us up to date with the latest releases of the libraries, frameworks or programming languages we care about.
UPDATE: UpToDate may have started as a pet project that helped me write this article but it’s grown into a real website now, that developers like you rely on to keep themselves updated. It’s even got a its own domain name: up-to.date!
Okay, Let’s go!
1. Create a new Jekyll project
If you are new to Jekyll or need a refresher, check out my in-depth guide on starting a new Jekyll site. Otherwise, these quick steps should suffice.
Initiate a new Jekyll project from you terminal:
jekyll new uptodate
CD to your project and bundle the gems:
cd uptodate
bundle
Let’s now update the default config. Open the _config.yml file and change its content to your liking. For UpToDate, it will look like this:
# Update default values
title: UpToDate
email: keep-me@up-to.date
description: >-
  Keep track of the latest releases of your favorite
  libraries, frameworks and programming languages
baseurl: ''
url: https://up-to.date

# Put my own twitter and github usernames
twitter_username: mzrnsh
github_username:  mzrnsh

# Keep the default theme and plugins
theme: minima
plugins:
  - jekyll-feed
Let’s confirm there are no issues so far:
bundle exec jekyll serve
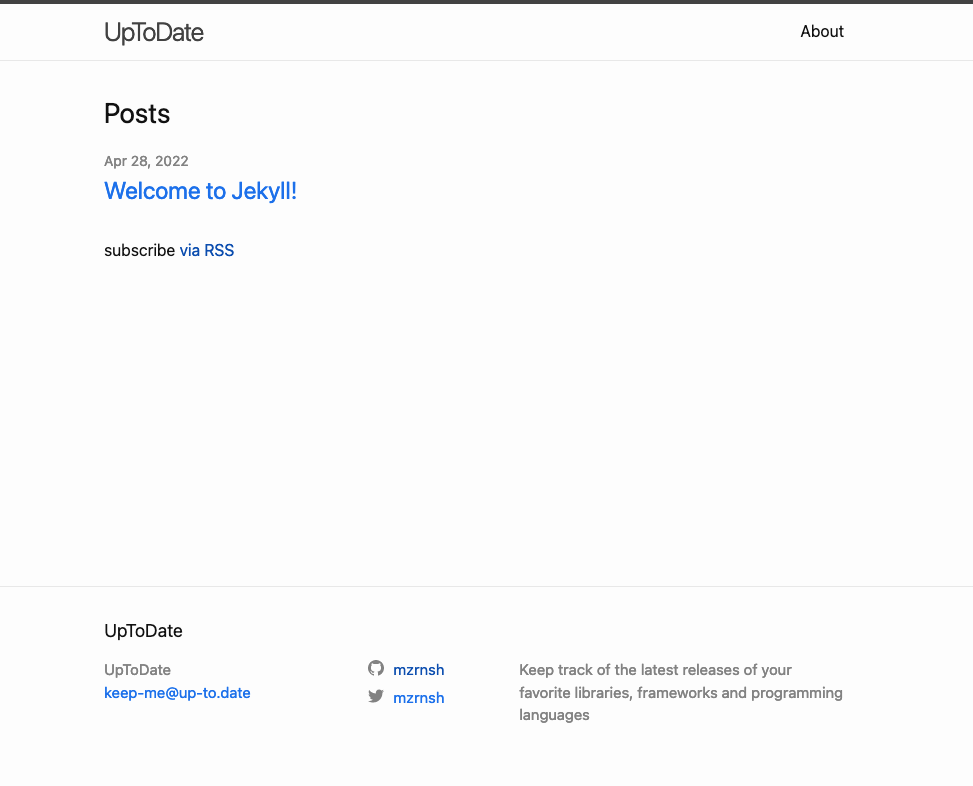
Go to http://localhost:4000. If you see something like this, you’re ready for the next step:
2. Display some data the native way
Before we throw in Airtable, let’s add some data the native way and display it on a page to make sure it all worked before we started breaking things.
Add _data folder to the project’s root, and create a YAML file in it. In our
case, it will be _data/things.yml file as we will be tracking the version
numbers of all sorts of things. Let’s add a couple entries to it:
- name: Ruby on Rails
  version: 7.0.2.3

- name: Tailwind CSS
  version: 3.0.24

- name: Font Awesome
  version: 6.1.0
Next let’s display this data on the homepage. Open the index.markdown file and change its content to something like this:
---
layout: home
---

{% for thing in site.data.things %}
  - {{ thing.name }}: {{ thing.version }}
{% endfor %}
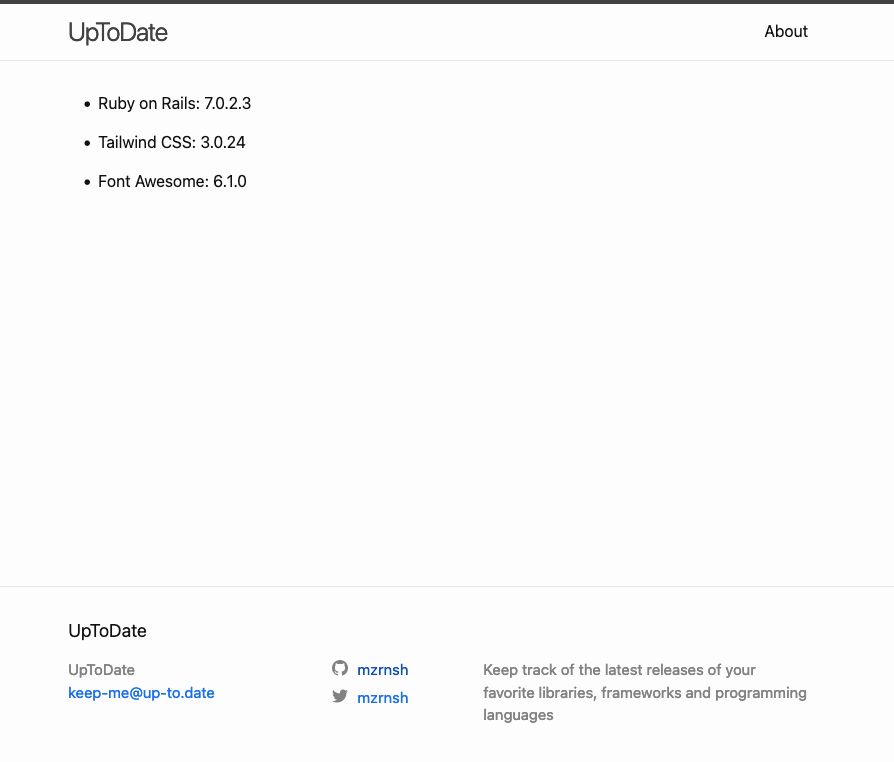
Since I am using the default Minima theme, the homepage comes with a blog section. Let’s get rid of it. The proper way to do this is overriding the default layout, or using a new layout but that is beyond the scope of this tutorial. Instead, let’s just delete the demo blog post file from the _posts directory. With no posts left, the theme will hide the blog section and the homepage will look nice and clean:
3. Create an Airtable base
With the initial version of UpToDate looking and working as intended, we can now start working on our Airtable integration.
First we need an Airtable base that houses the same data as we are displaying on our homepage. Head over to Airtable dashboard and create a new base. Here’s what it looks like for UpToDate:
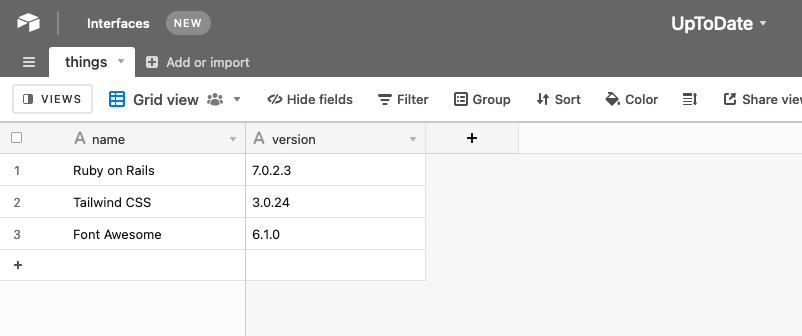
Mind the capitalization of the table and column names. We will need to refer some of those values as strings in later steps.
I created this base manually as I have only 3 entries. If you have a lot more data, Airtable has various import tools to make things easier for you.
Pssst! Blogging on a static site? Collecting visitor emails has just gotten easier than ever with:
👉 weightless.so 🪶Setting it up takes ~90 seconds and $0 USD
This is not a paid ad, it's a free one: Weightless is built by me 👋
4. Add Airtable API credentials
To speak with the Airtable API, we will need to use an API key and the base ID. Ideally, we don’t want to make them a part of the source code. Instead, we want to use environment variables. Let’s use the jekyll-dotenv gem for this:
echo "gem 'jekyll-dotenv'" >> Gemfile
bundle
If using git, make sure to include .env file in your .gitignore:
echo ".env" >> .gitignore
Now create the .env file in the root directory with the following variables:
AIRTABLE_API_KEY='YOUR_API_KEY'
AIRTABLE_BASE='YOUR_AIRTABLE_BASE_ID'
AIRTABLE_TABLE='YOUR_AIRTABLE_TABLE_NAME'
Replace the sample values YOUR_API_KEY, YOUR_AIRTABLE_BASE_ID, and YOUR_AIRTABLE_TABLE_NAME
with the actual values from your Airtable.
You can generate the API key on your Airtable account page.
And you can grab the Airtable base ID from the URL in your browser address bar.
Open the desired base and copy the part of the URL right after airtable.com/:

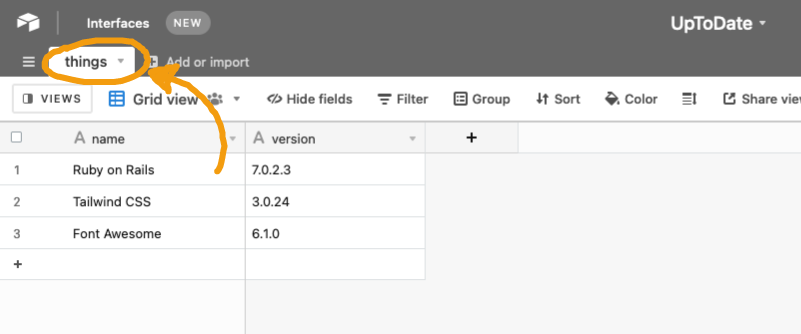
As for Airtable table name, it’s the name you gave to your table. For UpToDate it is “things” string:
Important: Airtable API keys are unscoped, meaning they have the same permissions as your user account, across all the bases you have access to. If this concerns you, the ‘official’ way around it is to create a new account with limited permissions and generate an API key from that account.
5. Create a custom Jekyll plugin for Airtable
First let’s install the airtable and activesupport gems that we will need
for our plugin:
echo "gem 'airtable'" >> Gemfile
echo "gem 'activesupport'" >> Gemfile
bundle
Next, we will be casually creating a custom Jekyll plugin! If you’ve already done this, you know there’s nothing scary about it. If not, see for yourself:
Create _plugins directory in the project root and a file named airtable.rb in it. That’s it, technically speaking, we already have a custom plugin. Now let’s make it do something.
Open the freshly created _plugins/airtable.rb file in the editor and paste
the following:
require 'dotenv/load'
require 'airtable'
require 'active_support/all'

airtable = Airtable::Client.new(ENV['AIRTABLE_API_KEY'])
table = airtable.table(ENV['AIRTABLE_BASE'], ENV['AIRTABLE_TABLE'])

File.open("_data/#{ENV['AIRTABLE_TABLE']}.yml", 'w') do |file|
  data = table.records.map(&:attributes)
  warning = "# Do not edit this file manually \n"

  file.write(warning, data.to_yaml)
end
Let’s read the code above line-by-line to make sure everything is clear:
- Lines 1-3: import the libraries we will need
- Lines 5-6: connect to Airtable and retrieve the records from the table that houses our data. As you see, this is where we use the environment variables we set up earlier
- Line 8: open the existing data file. As both the data file name and the
Airtable table name values are the same (in my case, “things”), I am using
"_data/#{ENV['AIRTABLE_TABLE_NAME']}.yml"as file path. If for some reason those two values do not match in your project, you can simply specify the file path as a string:'_data/other_things.yml' - Line 9: read the table records retrieved from Airtable and set the
datavariable’s value to it - Line 10: Add a reminder for our future selves that this is an
auto-generated file and shouldn’t be edited manually. Note that both the
#at the beginning and the\nat the end are required to keep the YAML file valid - Line 12: finally, complete the plugin’s work by uptading the file contents
Okay, let’s now confirm our plugin works. Start the Jekyll server, or if it’s already running, restart it:
bundle exec jekyll serve
Did the command run without errors? Nice!
Now open your data file and check if it was updated. From something like this:
- name: Ruby on Rails
  version: 7.0.2.3

- name: Tailwind CSS
  version: 3.0.24

- name: Font Awesome
  version: 6.1.0
It should have changed to something like this:
# Do not edit this file manually
---
- !ruby/hash:ActiveSupport::HashWithIndifferentAccess
  version: 3.0.24
  name: Tailwind CSS
  id: rec41IcxHOE3f9KU1
- !ruby/hash:ActiveSupport::HashWithIndifferentAccess
  version: 7.0.2.3
  name: Ruby on Rails
  id: recXh3RJKAfcsM4Kx
- !ruby/hash:ActiveSupport::HashWithIndifferentAccess
  version: 6.1.0
  name: Font Awesome
  id: recpx0BkIPC8VWkD9
Yes? Great! 🎉 Your Jekyll site is now connected to Airtable and each time you build or serve it, the fresh data will be fetched from Airtable.
6. Automate rebuilds
Hold on, we’re not quite done yet! We likely want changes in Airtable to reflect on the website automatically, without manual rebuilds and redeploys.
There are multiple ways to achieve this, and the best option might depend on your Airtable plan, production hosting and personal tastes. At the time of me writing this, Airtable only supports webhooks on their enterprise plan, so unless you have that, the outline of your automation will probably look a little something like this:
- Your hosting platform allows redeploys by URL pinging
- A ‘bot’ regularly checks your Airtable base for changes
- When the bot detects changes, it pings the redeploy URL
But wait, this way the website will be redeployed from the same commit as
before, so there will be no changes, right? Wrong! When the website is re-built,
the plugin we just wrote will make a fresh request to Airtable during the build
step, fetching the updated data, resulting the contents of your _data folder
on production environment to differ from what you have in your latest commit.
Really good, it should all work fine, in theory. But let’s go with an example to make sure it works for real. To host UpToDate I am using Netlify, and here’s how I automated rebuilds there 👇
Example: Auto-deploy on Netlify via Pipedream
Pipedream is a low code automation platform with a generous free plan and some powerful features, and it’s perfect for our use case.
The next steps assume that you have a working Netlify deployment and a Pipedream account.
a. Generate a Netlify build hook
Let’s start by creating a deploy URL in Netlify. They call such URLs “Build hooks” and they’re created from your project’s “Build and deploy” settings:
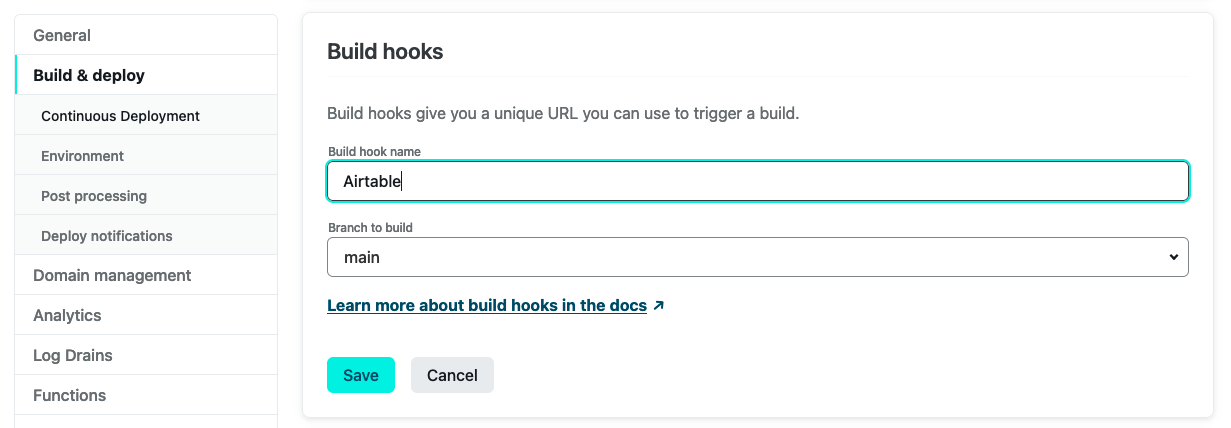 https://app.netlify.com/sites/YOUR_PROJECT/settings/deploys#build-hooks
It’s a good idea to give build hooks descriptive names to remind your future self what it is used for, and so what is likely to break if you delete it.
b. Connect Airtable to Pipedream
Let’s now head to Pipedream and open the “Accounts” menu. Click “Connect an app” button and select “Airtable” in the options. Then follow the steps in the wizard to complete the connection.
c. Create a Pipedream source
With Airtable connected to our Pipedream, let’s add a new source that will make use of this connection. This will be the bot I mentioned above, tirelessly checking our data, hoping to detect any changes in it.
- Go to the “sources” menu
- Click “New +” button
- Pick “Airtable” as the app and “New or Modified Records” as the action
Now you need to configure your source:
- Choose values for the “Airtable account”, “Base” and “Table” dropdowns
- Set up the timer. I went with “Every 24 hours” but you can do it more frequently if you like. Just make sure you are staying within your Pipedream plan allowance
- Name the source. I went with “UpToDate changes”
Here’s what my source config screen looks like:
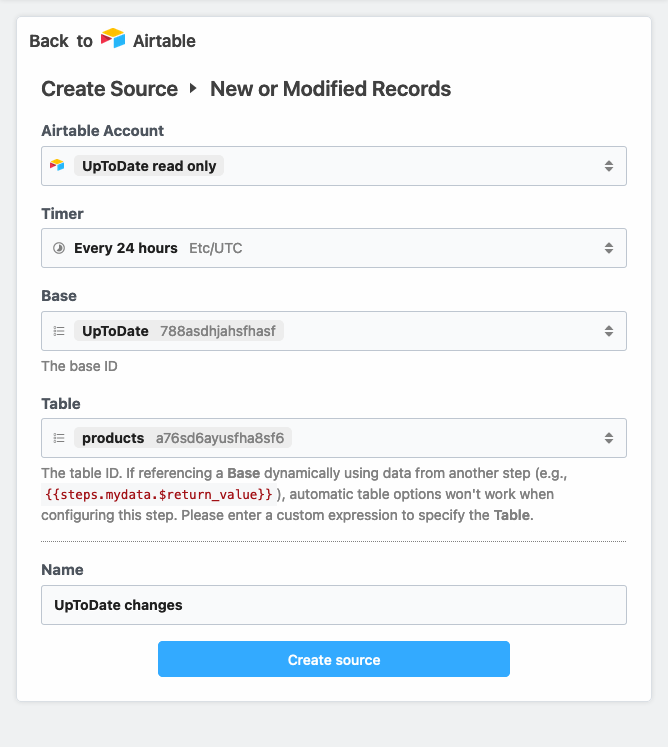
Once you create the source you need to make a couple changes, otherwise the out-of-box version of the source will emit an event for each change. We don’t want that as it will cause multiple Netlify deploys in case there are multiple changes since the last check.
Open the source and go to the “Configuration” tab. Here, in the code editor locate the guard clause that returns from the function in case there are no changes. Right now it’s this piece of code on line 45 (this may change):
if (!data.records.length) {
  console.log("No new or modified records.");
  return;
}
We don’t want to touch this part code, or anything that comes before that. Only the parts after it, up until the following lines close to the very end:
// We keep track of the timestamp of the current invocation
this.updateLastTimestamp(event);
I replaced everything between those two pieces of code with this:
// ...

if (!data.records.length) {
  console.log("No new or modified records.");
  return;
}

/* 👇 My changes 👇 */

this.$emit(data, {
  summary: `Changes detected: ${data.records.length}`
});

console.log(`Emitted changes.`);

/* 👆 My changes 👆 */

// We keep track of the timestamp of the current invocation
this.updateLastTimestamp(event);

// ...
d. Create a Pipedream workflow
Go to “Workflows” menu and click the “New +” button. It will pull up a menu to select a trigger, where you want to click the “USE ONE OF YOUR EXISTING SOURCES” button. This will let you select the source we created on the previous step.
Then add a step to this workflow. Pick “Send any HTTP Request” option. In the request configuration pick POST request type (that’s what Netlify build hooks expect) and paste the build hook URL we generated on step a.
Now give this workflow a good name it deserves. I went with “Rebuild UpToDate”. And click “Deploy”. Did you? Then you’re DONE! 🤩
From now on, when you, or others, update the data in Airtable, Pipedream will
catch the changes, and trigger a Netlify deploy. And Netlify will run our plugin
that will update Jekyll’s _data folder to reflect those changes, meaning the
the website will get updated without any extra effort from us 🙀